April 18th, 2023 - Composite Meeting Notes
Releasing Seat Mold from High Density Foam
Objectives:
Remove seat mold from foam
Dremel extra fiberglass off from the edges of the seat
Remove any imperfections on the seat
Summary:
The Process for Removing the Mold:
Materials Used:
50+ wooden stirring sticks
2 buff dudes
plastic scrapers
plastic crowbars
mallets
willpower
Steps Underwent:
1. Open the vacuum bag we made at the last meeting. This is being opened about three days from when the wet layup was made for the seat. To do this, rip the pink film from the gummy tape and reveal the seat inside.
2. Rip off the peel-ply (a white sheet with red lines) and the breather (soft sheet material). This required some strength and effort to peel off because the resin used for the wet layup seeped through all the materials and stuck them together.
Seat with the removed peel-ply and breather
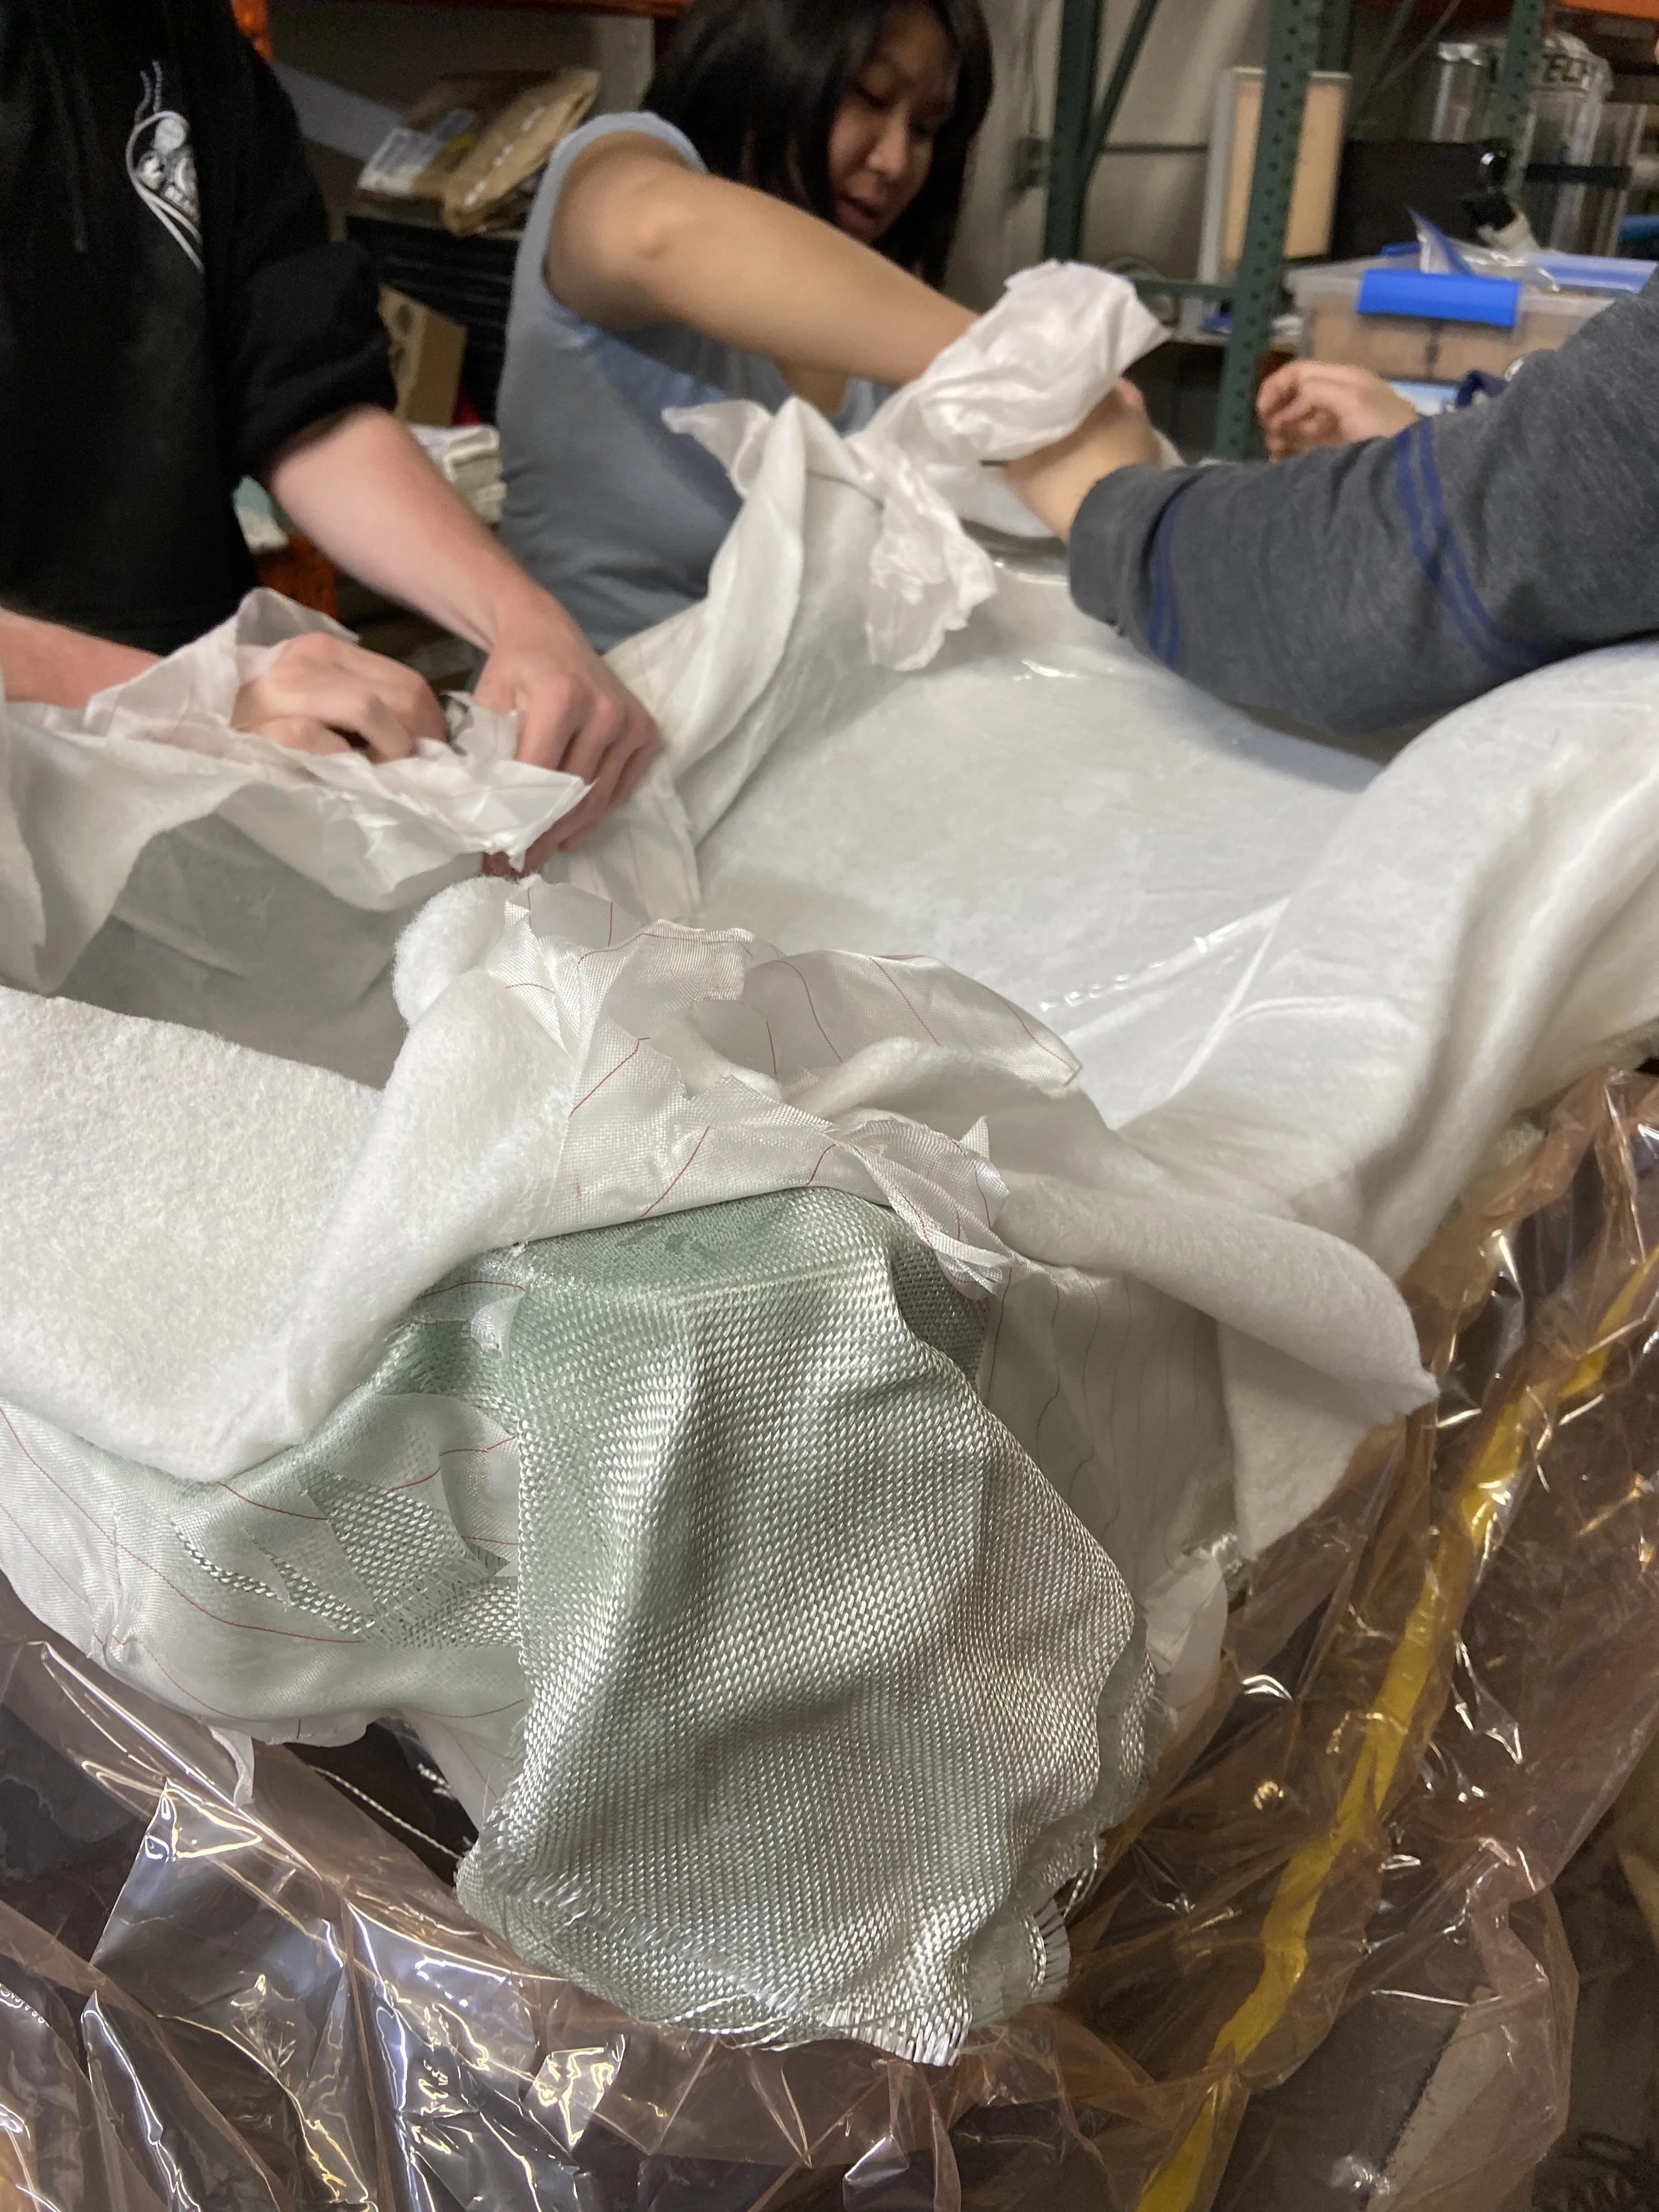
Ripping off the peel-ply
Cutting away excess fiberglass
3. Use plastic scrapers and start jamming them around the edges of the seat. LIft as much material off the high-density foam starting from the edges. Be careful of damaging the foam underneath.
4. Once the edges are mostly removed, use wooden stirring sticks and jam them underneath the lifted parts to carefully lift the mold from the foam. Use a mallet if necessary to push the sticks further into the mold.
5. At least 50 sticks were used to lift the mold. Eventually, we moved the seat outside when the mold had been lifted enough that two hands could fit underneath. Two people were used to hold down the foam mold and two others pulled upward on the excess fiberglass. This process helped a small bit, but was probably not a good idea as it risked the mold breaking.
6. We continued to use wooden sticks and mallets to push the sticks in between the foam mold and seat mold. Eventually, the seat just popped out! (thanks nolan)
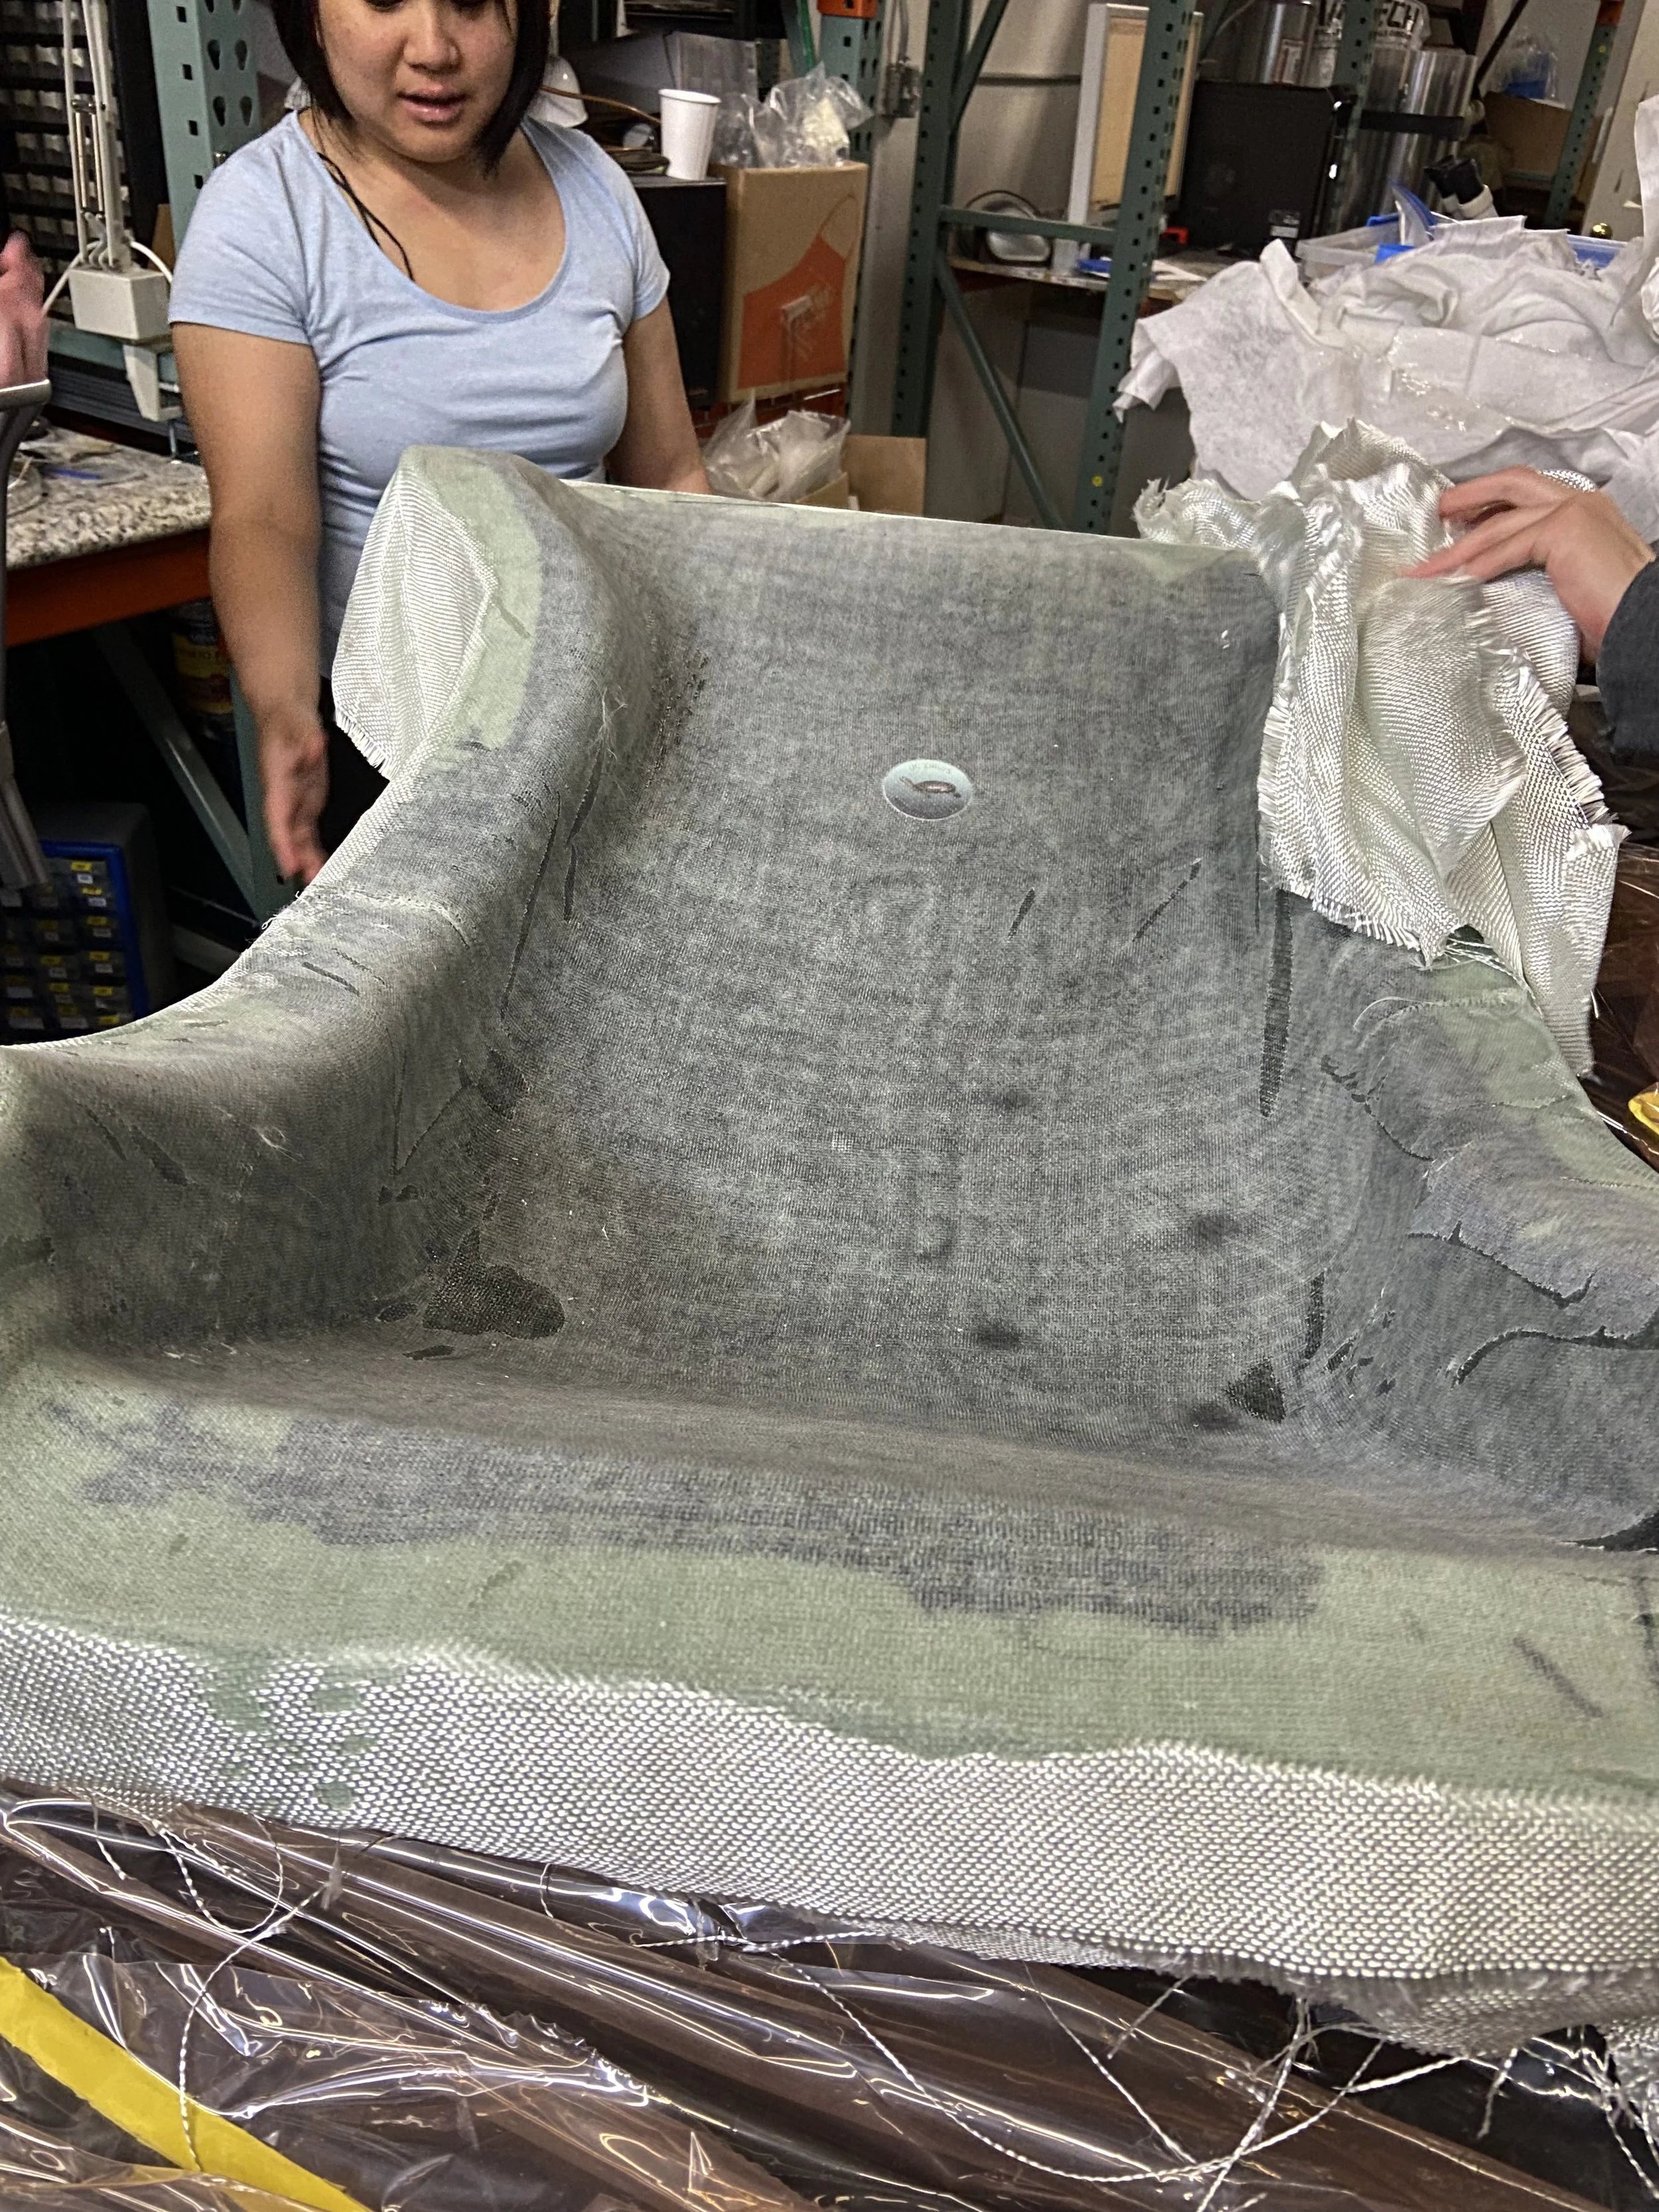
7. After releasing the mold, used scissors to cut away the extra fiberglass from the sides of the mold. Then went back with a Dremel to cut away all the excess. During our cut we followed the approximate contour of the hardened resin. Wearing all the possible PPE available during this task was very much worth it as the fiberglass particles are dangerous and make the skin very itchy when in contact for too long.
PPE (respirator, goggles, bodysuit)
Learning Notes:
The full process of removing the mold from the plug took about an hour. This is the best performance in the last few years. According to previous composite leads, this is largely due to applying “Honey Wax,” a mold release agent on the gel coat before laying the fiberglass on top. (Summary: Honey Wax yay!)
When cutting away the fiberglass using the Dremel, very lightly cut small layers at a time. This will make it easier to control the cut along the contour.
Be careful using the mallet to jam sticks in between the mold and the plug as it may damage the mold.
The amount of time spent in sanding is very well worth it
The parts with imperfections were likely due to imperfections in the gel coat on the plug. The release of the mold would probably have been sped up without the imperfection.
Mold Released from Plug!